Customizer UI API
Summary
-
Callback
4.1 getProductInfo
4.2 addToCart
4.3 editAddToCart
4.4 getSaveDesign
4.5 getProductPrice
4.6 getProductAttribute
4.7 addToCartNameAndNumber
4.8 editAddToCartNameAndNumber
4.9 onBackClicked
4.10 getSharedDesign
4.11 addToCartBulk
4.12 editAddToCartBulk
4.16 convertPriceCurrency
4.17 MOQ (Minimum Order Quantity) -
CUSTOMIZE button
5.1 Adding Customizer Button
5.2 HTML FORM
5.3 JavaScript to Send the Product Selection to the Customizer
5.4 Full HTML code Example
1. Overview
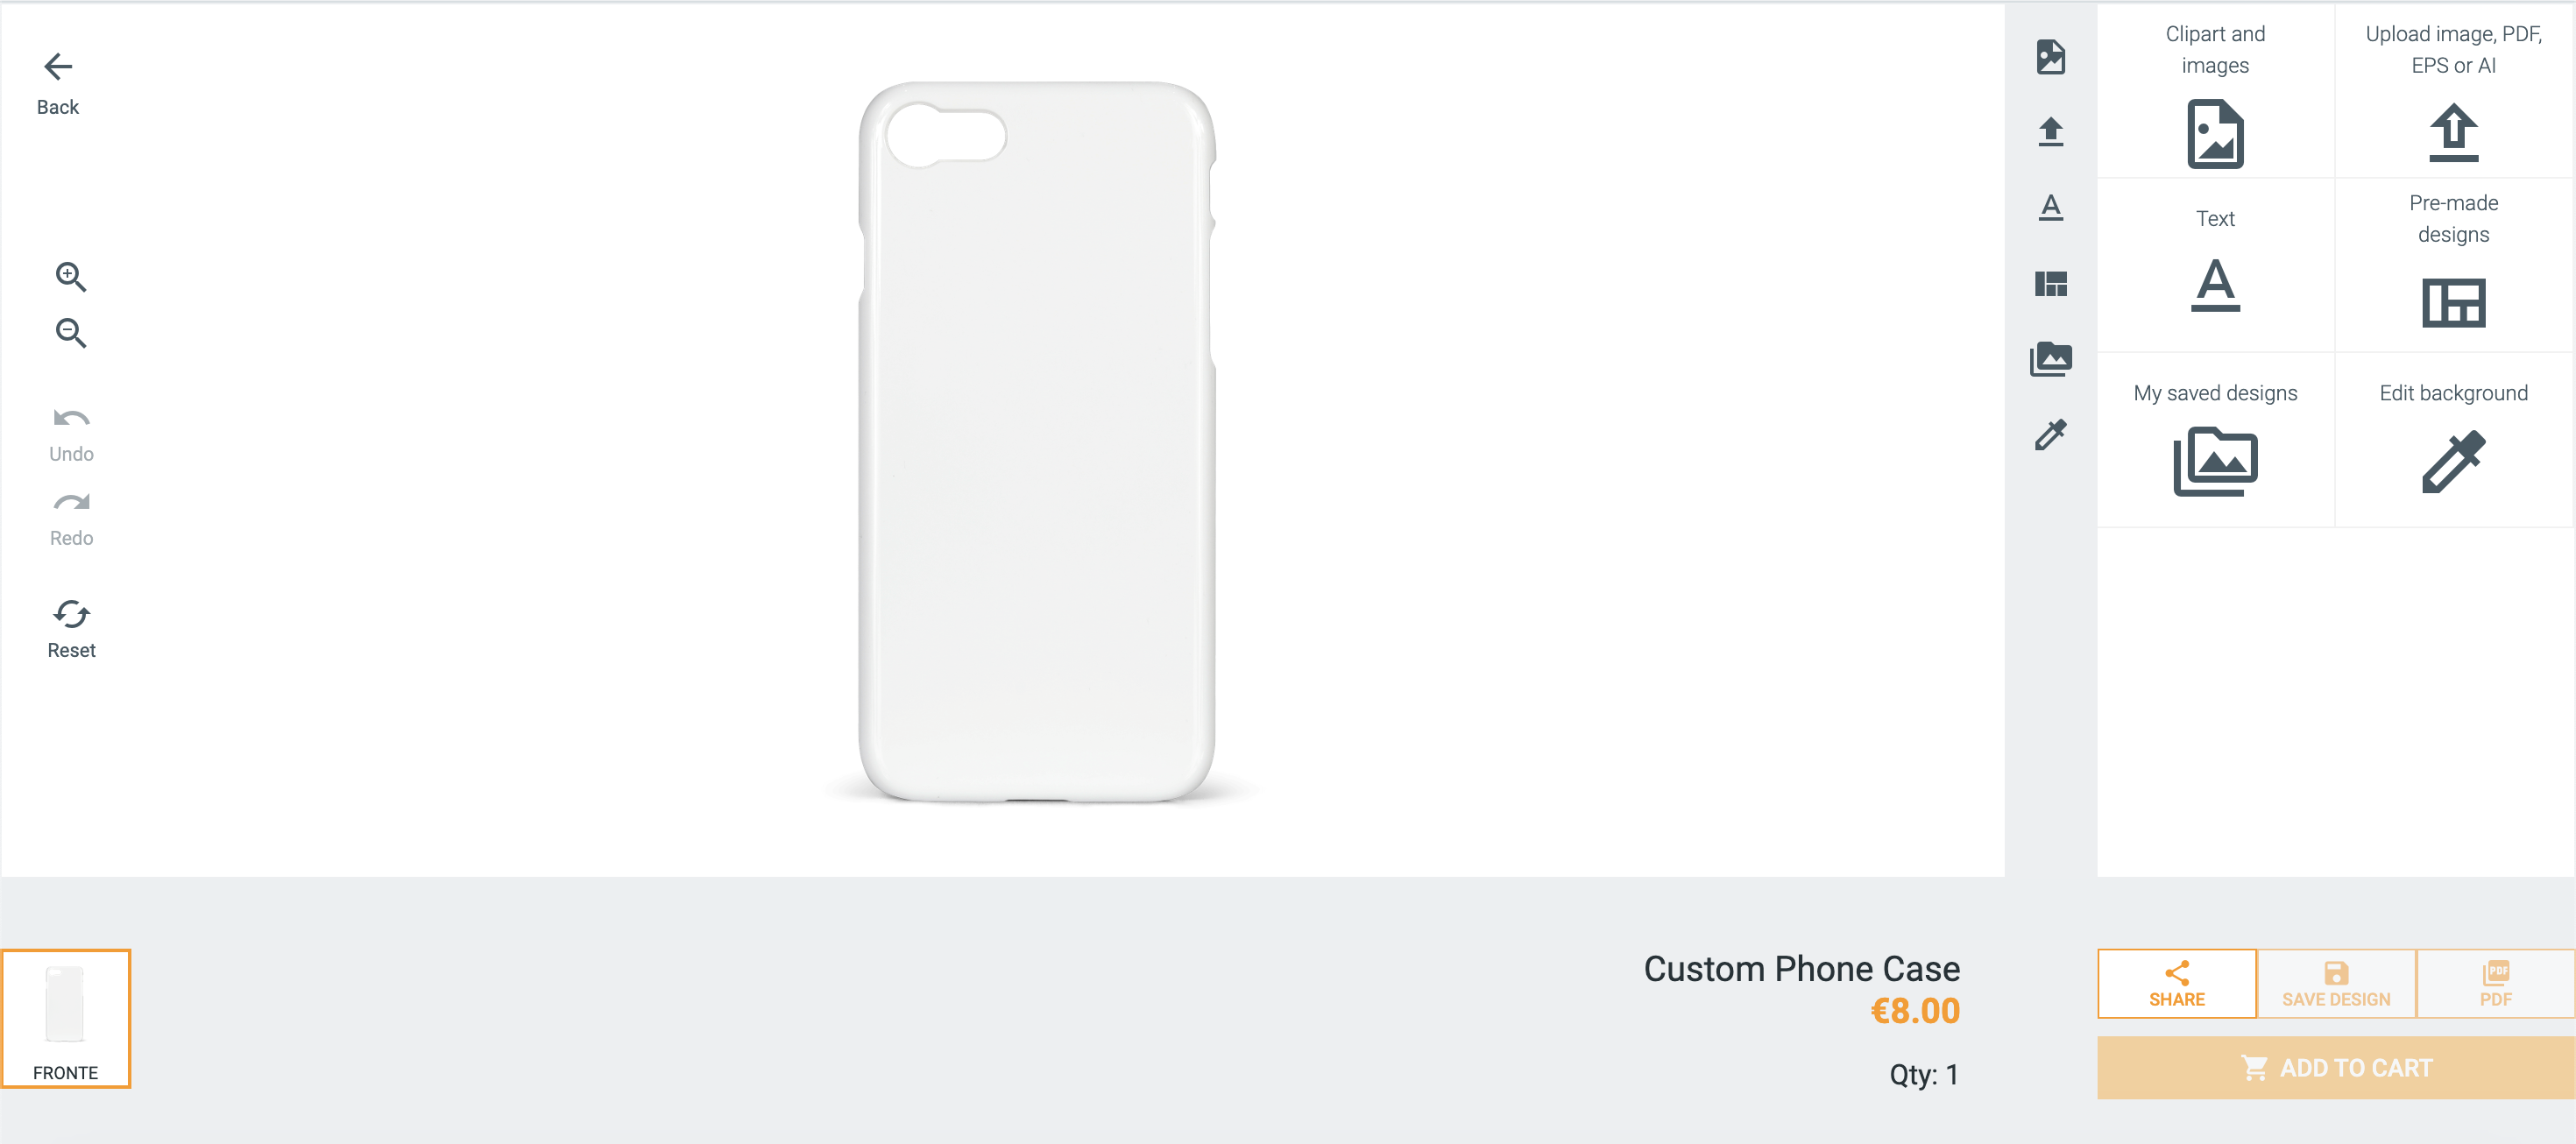
The Customizer UI page plays a pivotal role in seamlessly integrating the Visual Product Customizer into your e-commerce website, offering a dynamic and engaging experience for your customers.
This interactive and sleek UI, incorporated within an iframe, empowers users to effortlessly create and modify designs on your products before adding them to the shopping cart.
1) Creating a new page in your website (format: HTML, PHP, CSHTML, etc. depending on the technology used) that will host the IFrame of the ZAKEKE customizer
2) Entering configuration JavaScript code
3) Defining the following JavaScript callback in your website, which will be call by Zakeke for:
-
"getProductInfo": obtaining information on the product selected by the customizer
-
"addToCart": adding a product to the shopping cart
-
"editAddToCart": modifying the design of a customized product previously added to the shopping cart
For the various endpoints required by the integration, Zakeke allows a JavaScript function to be implemented and passed to Zakeke as a callback.
2. Create the Customizer Page
In your e-commerce website, you have to create a new page (in the example an HTML page) whose layout will be that of your website and the content will have a div so defined (highlighted):
<!-- header html layout... -->

<div class="container">

<div id="zakeke-container">

</div>

</div> <!-- footer html layout... -->
3. Configuration JavaScript
Before closing the <body> tag of the previously created page, add the following JavaScript references:
<script
    src="https://portal.zakeke.com/scripts/integration/apiV2/customizer.js">
</script>
Then add the following JavaScript block that will start the customizer on the page:
<script>

var customizer = new ZakekeDesigner();

//Create config object
var config = {
    tokenOauth: "Token Oauth",
    //...
}

//Create Iframe
customizer.createIframe(config);

</script>
In addition to creating the iframe, you also have the option to remove it using the removeIframe function.
<script>

var customizer = new ZakekeDesigner();

//Create Iframe
customizer.createIframe(config);

//Remove Iframe
customizer.removeIframe();

</script>
3.2 Config
config is a JavaScript object which allows you to parameterize some aspects of the integration and, above all, to specify the various callback necessary for the dialogue between the ecommerce and Zakeke. The config object is structured as follows:
var config = {
    tokenOauth: "Token Oauth",
    // Product configuration
    productId: "Id product",
    productName: "Name product",
    getProductInfo: { javascript function object },
    getProductPrice: { javascript function object },
    getProductAttribute: { javascript function object },
    // Add to cart
    cartButtonText: "Add To Cart",
    addToCart: { javascript function object },
    editAddToCart: { javascript function object },
    // Name and numbers (add to cart and edit product)
    isNamesAndNumbers: false,
    addToCartNameAndNumber: { javascript function object },
    editAddToCartNameAndNumber: { javascript function object },
    // Bulk variations purchase (add to cart end edit product)
    isMultipleVariations: true,
    addToCartBulk: { javascript function object },
    editAddToCartBulk: { javascript function object },
    isBulkIndividualFile: true,
    // Share design
    isSharedDesignUrl: true,
    getSharedDesign: { javascript function object },
    ShareUrlPrefix: "http://your.store.com/",
    // Save design
    isSaveDesign: true,
    getSaveDesign: { javascript function object },
    //--
    onBackClicked: { javascript function object },
    //--
    designId: "",
    hideVariants: true,
    inventoryManagement: false,
    priceTaxIncluded: false,
    manageConvertPriceCurrency: false,
    convertPriceCurrency: { javascript function object },
    enableMoq: false,
    isClientPreviews: true,
    mobileVersion: false,
    culture: "it-IT",
    currency: "EUR",
    loadTemplateId: "",
    templateCode: "",
    preDesignedTemplateMacroCategories: null,
    labelTax: "hidden",
    quantity: 1,
    selectedAttributes:
    {
        "attributekey1": "selectedattributevalue1",
        //...//
        "attributekeyn": "selectedattributevaluen"
    },
    sides: ["codeSide1",...,"codeSiden"],
    firstSideId: "codeSide1",
    firstVariantId: "variantCode1",
    firstSidePrintingMethods:
    {
        "codeSide1": "printingMethodCode1",
        //...//
        "codeSiden": "printingMethodCoden"
    },
    // resizable starting measures (in cm)
    resizableStartWidth: 10,
    resizableStartHeight: 10,
    additionalData: {}
};
For products created in Zakeke using CSV files, the productid specified in productJson object must match the MasterProductID specified in the products.txt file. Go to CSV product data specification.
Another property of the config object to pay attention to in case the product has variants is selectedAttributes. This property specifies the complete selection of all attribute values that define the variant chosen by the user on the product page. The property specifies a list in which for each attribute its name or identification key is reported (as per the form on the product page) and the encoded value. If the product was uploaded via the products CSV file, the key-value pairs specified in the Attributes field must be present among the key-value pairs specified for the property (For more details go to how to connect products through CSV.).
For example, in the case of a product with color and size variations, the property could have the following values:
{
    // ... //
    selectedAttributes:
    {
        "Color": "Y",
        "Size": "M"
    }
}
indicating the selection Yellow (Y) for the color attribute (Color) and Medium (M) for the size attribute (Size).
The following table explains the meaning and format of the various properties of the config object.
| Property | Description | Additional info |
|---|---|---|
| tokenOauth | Authentication OAuth token with additional information about visitor and/or authenticated user (for more details go to how to obtain an authentication token with customer and/or visitor code). Important: make sure to include the VisitorCode and the CustomerCode in the token. Without them the Customizer will not identify the user as an End-user and will instead treat them as a Seller, which causes new templates to be created when a design is saved. | Type: string Default: empty Required: true |
| productId | Unique product ID | Type: string Required: true |
| productName | Name product | Type: string Required: true |
| designId | Zakeke generated unique design ID of the customized product to be modified. | Type: string Default: empty Required:: false (mandatory for editing a custom product design) |
| loadTemplateId | Opens the iframe directly with the declared templateID | Type: string Default: empty Required:: false |
| templateCode | Opens the iframe directly with the declared templateCode | Type: string Default: empty Required:: false |
| preDesignedTemplateMacroCategories | Filters the pre-designed template macro-categories and categories shown in the customizer, based on the reference keys configured in the back-office. It also allows you to hide the "change template" button entirely. For more details go to preDesignedTemplateMacroCategories. | Type: array | null Default: null Required:: false |
| currency | Example: USD. Currency selected by the customer on your store, with ISO 4217 encoding. | Type: string Default: empty Required:: true |
| culture | Example: en-US. IFRAME interface language based on Microsoft encoding table. For details on encoding go to this link. | Type: string Default: empty Required:: true |
| mobileVersion | true: customizer IFRAME will be adapted for the mobile version false: customizer IFRAME will be adapted for the desktop version | Type: boolean Default: false Required: false |
| labelTax | Indicates how tax label will be presented in the IFRAME interface. Possible values: - hidden: the label is hidden - including: label "taxes included" is displayed - excluding: label "taxes excluded" is displayed hidden | Type: string Default: empty Required:: false |
| quantity | Customizable product quantity to be added/edited | Type: integer Default: undefined Required:: true |
| imagePreviewHeight | Height in pixel of the preview generated by Zakeke | Type: integer Default: 200 Required:: false |
| imagePreviewWidth | Width in pixel of the preview generated by Zakeke | Type: integer Default: 200 Required:: false |
| isClientPreviews | Flag to enable the generation of the preview image for each side of the customized product. | Type: boolean Default: false Required:: false |
| cartButtonText | Label of the "Add to cart" button inside the IFRAME Add to cart | Type: string Default: empty Required: false |
| hideVariants | If it is false, you will have the opportunity to change the variant. For more details go to hideVariants | Type: boolean Default: false Required: false |
| getProductInfo | JavaScript feature to obtain product information based on the selection of attributes. For more details go to how to configure the "getProductInfo". | Type: string Default: none Required:: true |
| getProductPrice | JavaScript feature on Merchant website to send the final price of the product. how to configure the "getProductPrice" | Type: function Default: none Required: true |
| getProductAttribute | JavaScript function on Merchant web site. For more details go to how to configure the "getProductAttribute". | Type: function Default: undefined Required: true |
| addToCart | JavaScript function on Merchant web site to handle adding of customized product to shopping cart. For more details go to how to configure the "AddToCart" | Type: function Default: undefined Required: true |
| editAddToCart | JavaScript function on Merchant web site to handle editing of customized product into shopping cart. For more details go to how to configure the "editAddToCart". | Type: function Default: undefined Required: true |
| isNamesAndNumbers | Enable the Name And Number feature | Type: boolean Default: false Required: false |
| addToCartNameAndNumber | JavaScript function on Merchant web site to handle adding customized products with Names and Numbers to shopping cart. For more details go to how to configure the "addToCartNameAndNumber". | Type: function Default: undefined Required: false (mandatory if isNamesAndNumbers has been defined) |
| editAddToCartNameAndNumber | JavaScript function on Merchant web site to handle editing of customized products with Names and Numbers into shopping cart. For more details go to how to configure the "editAddToCartNameAndNumber". | Type: function Default: undefined Required: false (mandatory if isNamesAndNumbers is set to true) |
| isMultipleVariations | Enable Bulk Variation Forms feature | Type: boolean Default: false Required:: false |
| addToCartBulk | JavaScript function on Merchant website to handle adding customized products to shopping cart with bulk variation purchase. For more details go to how to configure the "addToCartBulk". | Type: function Default: undefined Required: false (mandatory mandatory if isMultipleVariations is set to true) |
| editAddToCartBulk | JavaScript function on Merchant website to handle editing of customized products into shopping cart. Bulk Variation version. For more details go to how to configure the "editAddToCartBulk". | Type: function Default: undefined Required: false (mandatory mandatory if isMultipleVariations) |
| isBulkIndividualFile | Enables the possibility of using a different design (and therefore obtaining a different print file) for each different variant chosen in the Bulk Variations Form. | Type: boolean Default: false Required:: false |
| isSharedDesign | Allows the merchant to manage the share functionality | Type: boolean Default: false Required: false |
| getSharedDesign | JavaScript feature on the Merchant’s website to manage the share functionality. For more details go to how to configure the "getSharedDesign". | |
| shareUrlPrefix | Option to enter the domain of the merchant in the preview URL | Type: string Default: empty Required:: false |
| isSaveDesign | true: enable feature to save or change existing design for a customized product previously added into cartfalse: disable feature explained above | Type: boolean Default: false Required: false |
| getSaveDesign | JavaScript function on Merchant web site to handle change design event of customized products into shopping cart. For more details go to how to configure the "getSaveDesign". | Type: function Default: undefined Required: false (mandatory if canSaveDesign is set to true) |
| sides | Example:['side1','side2'] Codes of product sides (defined in the sides CSV) on which customization is allowed | Type: array of string Default: undefined Required:: false |
| firstSideId | Code of product side (defined in the sides CSV) to open initially when the customizer loads. | Type: string Default: undefined Required:: false |
| firstVariantId | Code of product variant to select initially when the customizer loads. | Type: string Default: undefined Required:: false |
| firstSidePrintingMethods | Specifies which printing method to open initially for each side when the customizer loads. It is formed by a set of key-value pairs where the key is the side code and the value is the printing method code. | Type: object Default: undefined Required:: false |
| additionalData | Additional data to send to merchant | Type: object Default: undefined Required: false |
| manageConvertPriceCurrency | If true, enables manual management of Extra options price conversion through the convertPriceCurrency callback. | Type: boolean Default: false Required: false |
| convertPriceCurrency | JavaScript function to handle price conversion of Extra options. Required if manageConvertPriceCurrency is set to true. For more details go to how to configure the "convertPriceCurrency". | Type: function Default: undefined Required: false (mandatory if manageConvertPriceCurrency is set to true) |
| enableMoq | If true, enables the MOQ (Minimum Order Quantity) feature in the customizer iframe. When enabled, the customizer can enforce minimum quantity, step increments, or predefined quantity packages defined at product or variant level. The MOQ rules are passed to the merchant via the moqInfo object in the add-to-cart callbacks. For more details go to MOQ feature. | Type: boolean Default: false Required: false |
| selectedAttributes | Selected product attributes sent to the customizer page. They are formed by a set of key-value pairs consisting respectively of the attribute name (used in product page forms) and the selected coded value. N.B. The sequence of key-value pairs represents the entire selection of attributes for the product variant chosen by the user on the product page of the ecommerce. To identify the customizable variant in Zakeke, this sequence must contain the sub-sequence of key-value pairs corresponding to the customizable variant passed to Zakeke via CSV feed. (For more details go to how to connect products through CSV.). If product has not variants, the value must be an empty object ('selectedattributes': ) | Type: object Default: undefined Required:: true |
| resizableStartWidth | Sets the initial width (in cm) for resizable products. Useful for controlling the resizable product measures externally, outside the Customizer. | Type: number Default: undefined Required: false |
| resizableStartHeight | Sets the initial height (in cm) for resizable products. Useful for controlling the resizable product measures externally, outside the Customizer. | Type: number Default: undefined Required: false |
3.3 preDesignedTemplateMacroCategories
The preDesignedTemplateMacroCategories property lets you control which pre-designed template macro-categories and categories are shown to the end user inside the customizer, and whether the "change template" button is available at all.
Filtering is based on the reference keys you assign in the Zakeke back-office. In the Pre-Designed Templates section, you can edit a reference key for each macro-category and for each category through the Edit reference key option.
Those reference keys are the values you pass in the id properties of this config option:
{
    //...//
    preDesignedTemplateMacroCategories: [
        {
            id: 'MACRO1',
            categories: [
                {
                    id: 'CAT11'
                }
            ]
        }
    ],
    //...//
}
Each object in the array has the following structure:
| Property | Data type | Description |
|---|---|---|
| id | string | The reference key of the macro-category (as configured in the back-office). |
| categories | array | List of the categories to show for this macro-category. Each object contains an id property with the reference key of the category. |
The behavior depends on the value passed:
| Value | Behavior |
|---|---|
null or undefined | Default behavior: all pre-designed template macro-categories and categories are shown, as of today. |
[] (empty array) | The end user cannot change the template and the "change template" button disappears. |
Array of objects with id (as in the example) | Only the macro-categories and categories matching the specified reference keys are shown (filtered). |
The id values must match the reference keys configured in the back-office for the macro-categories and their categories. Reference keys that do not match any configured value are ignored.
4. JavaScript callback
4.1 GetProductInfo
Zakeke IFRAME needs to use a callback to get information such as the updated price inclusive of the design. You can set the callback function in the config JavaScript object:
function callback(zakekeData){
    //...
    return data = {
        price: 40,
        isOutOfStock: false
    };
}
// Customizer config
var config = {
    //...
    getProductInfo : callback,
    //...
}

var customizer = new ZakekeDesigner();

customizer.createIframe(config)
The callback function will be called with the following javascript object:
{
    productid: "productId",
    quantity: 1,
    selectedattributes:
    [
        /* (e.g.[{"color":"0","size":"1"}]) */
        {"attrKey1":"attrValue1"},...,
        {"attrKeyn":"attrValuen"}
    ],
    price: 10.5,
    percentPrice: 10,
    design: {
        sides: [
            {
                referenceKey: "side1",
                name: "Front",
                hasDesignElements: true,
                usedColors: 3
            },
            {
                referenceKey: "side2",
                name: "Back",
                hasDesignElements: false,
                usedColors: 0
            }
        ]
    },
    additionaldata: {}
}
Where:
| Property | Type | Description | Default value | Required |
|---|---|---|---|---|
| productId | string | Unique product ID | ||
| quantity | integer | Selected quantity of product to be customized | ||
| selectedattributes | array | array of key-vaue pair of selected product attributes N.B. the attribute keys match those imported from CSV | ||
| price | money | Unit price (in the currency of your e-commerce) of the created design to be added to the one of the product | ||
| percentPrice | money | Percentage of the created design to be added to the one of the product, to be applied to the unit price of the product | ||
| design | object | Object containing design information with sides data | ||
| design.sides | array | Array of side objects containing: referenceKey (side identifier), name (side display name), hasDesignElements (boolean indicating if side has design elements), usedColors (number of colors used on this side) | ||
| additionaldata | object | Additional data to send to JavaScript function | optional |
The price property specifies the unit price, encompassing any initial setup costs. It is important to carefully note the number of decimal places in this price, as it may exceed the standard two digits.
If we indicate the unit price of the product on the e-commerce with unitPrice, the global unit price could be calculated as follows:
finalUnitPrice = unitPrice + price + (unitPrice*percentPrice/100);
finalPrice = finalUnitPrice * quantity;
The callback response must be structured as follows:
{
    price: 30.5,
    isOutOfStock: false
}
Where:
| Property | Type | Description |
|---|---|---|
| finalprice | money | Final price calculated depending on the added design and unit price of the model product |
| isoutofstock | boolean | false: if product is in stock true: if product is not available (out of stock, ect.) |
4.2 AddToCart
Zakeke will call this function to communicate with the ecommerce that the end user has decided (by clicking on the "Add to cart" button) to add the customized product to the shopping cart.
The AddToCart function can be implemented on the client-side by defining a JavaScript callback. This can be specified via the addToCart property of the config object:
4.2.1 JavaScript callback
The callback will be called with the following Javascript object:
{
    productId: "productId",
    designId: "designId",
    quantity: 1,
    selectedattributes:
    [
        /* (e.g. [{"color":"0","size":"1"}]) */
        {"attrKey1":"attrValue1"},...,
        {"attrKeyn":"attrValuen"}
    ],
    additionaldata: {},
    extraOptions: [
        {
            name: "extraOptionName",
            value: "extraOptionValue",
            price: 10.5,
            metadata: { /* extra option specific data */ }
        }
    ],
    moqInfo: {
        minQuantity: 10,
        quantityStep: 5,
        quantityPackages: null,
        quantityRuleType: "product"
    }
}
Where:
| Property | Type | Description |
|---|---|---|
| productId | string | Unique product ID |
| designId | string | Unique design ID applied to the customized product |
| quantity | integer | Quantity of customized product to add to shopping cart. When MOQ is enabled, this quantity overrides the quantity defined in the config object and must be respected by the merchant. |
| selectedattributes | array | array of key-value pair of selected attributes |
| extraOptions | array | Array of extra option objects. Each object contains: name (string - the extra option name), value (string | null - the selected value), price (number - the price associated with the extra option), metadata (object | undefined - optional object with extra option specific properties) |
| moqInfo | object | MOQ (Minimum Order Quantity) rules applied to the product. Present only when enableMoq is set to true in the config object. For more details go to MOQ feature. |
N.B. Attribute keys must match those imported by CSV products. Additional data is optional and should be sent to the callback.
The designId provided as input to the callback can be used in the API call to Zakeke to retrieve details about the user's created design. (Go to DESIGN API for more information.)
In response, the callback must provide a Javascript object with the URL of the shopping cart page.
{
   window.location.href = "string (shopping cart URL)";
}
4.3 EditAddToCart
After adding a custom product to the shopping cart, a user may wish to change its design by reopening the Zakeke customization interface, where the initial “Add to Cart” button will be replaced by the “Save Changes” button. When this button is pressed, Zakeke calls the specified callback to notify e-commerce that the customized product has undergone changes.
// Callback edit product into shopping cart
function callback(zakekeData){
    //...
}
// Customizer config
var config = {
    //...
    editAddToCart : callback,
    //...
}

var customizer = new ZakekeDesigner();

customizer.createIframe(config)
N.B.The design ID will remain unchanged even after the editing.
4.3.1 JavaScript callback
The callback will be called with the following Javascript object:
{
    productId: "productId",
    designId: "designId",
    quantity: 1,
    selectedattributes: {
        [
            /* (e.g. [{"color":"0"},{"size":"1"}]) */
            {"attrKey1":"attrValue1"},
            //...,
            {"attrKeyn":"attrValuen"}
        ],
    }
    additionaldata: {object},
    extraOptions: [
        {
            name: "extraOptionName",
            value: "extraOptionValue",
            price: 10.5,
            metadata: { /* extra option specific data */ }
        }
    ],
    moqInfo: {
        minQuantity: 10,
        quantityStep: 5,
        quantityPackages: null,
        quantityRuleType: "product"
    }
}
Where:
| Property | Type | Description |
|---|---|---|
| productId | string | Unique product ID |
| designId | string | Unique design ID applied to the customized product |
| quantity | integer | Quantity of customized product to add to shopping cart. When MOQ is enabled, this quantity overrides the quantity defined in the config object and must be respected by the merchant. |
| selectedattributes | array | array of key-value pair of selected attributes |
| extraOptions | array | Array of extra option objects. Each object contains: name (string - the extra option name), value (string | null - the selected value), price (number - the price associated with the extra option), metadata (object | undefined - optional object with extra option specific properties) |
| moqInfo | object | MOQ (Minimum Order Quantity) rules applied to the product. Present only when enableMoq is set to true in the config object. For more details go to MOQ feature. |
N.B. Attribute keys must match those imported by CSV products. Additional data is optional and should be sent to the callback.
The designId provided as input to the callback can be used in the API call to Zakeke to retrieve details about the user's modified design. Go to Design API for more information.
In response, the callback must provide a JSON object with the URL of the shopping cart page.
{
    window.location.href = "string (shopping cart URL)";
}
4.4 GetSaveDesign
JavaScript functions to handle the change design event for a customized product previously added to the cart. The callback will receive the JSON object defined below as input.
{
    designId: "designId"
}
Where:
| Attribute | Description |
|---|---|
| designId | Unique design ID |
4.5 GetProductPrice
The getProductPrice function can be implemented on the client-side by defining a JavaScript callback. This can be specified via the getProductPrice property of the config object:
When the MOQ feature is enabled (enableMoq: true), the getProductPrice callback must be implemented. The customizer relies on this callback to query the store for the product price based on the currently selected quantity, which can change dynamically when MOQ rules apply. For more details go to MOQ feature.
// Callback edit product price
function callback(zakekeData){
    //...
    return data = {
        price: 40,
        isOutOfStock: false
    };
}
// Customizer config
var config = {
    //...
    getProductPrice : callback,
    //...
}

var customizer = new ZakekeDesigner();

customizer.createIframe(config)
Zakeke expects a final unit price from the e-commerce site, to be multiplied by the quantity to have a total price of the customized product.
4.5.1 JavaScript callback
The callback will be called with the following Javascript object:
{
    productid: "productId",
    selectedattributes:
    [
        /* (e.g. [{"color":"0"},{"size":"1"}]) */
        {"attrKey1":"attrValue1"},
        //...,
        {"attrKeyn":"attrValuen"}
    ],
    percentPrice: 0,
    price: 0,
    design: {
        sides: [
            {
                referenceKey: "side1",
                name: "Front",
                hasDesignElements: true,
                usedColors: 3
            },
            {
                referenceKey: "side2",
                name: "Back",
                hasDesignElements: false,
                usedColors: 0
            }
        ]
    },
    quantity: 1
}
Where:
| Property | Type | Description |
|---|---|---|
| productId | string | Unique product ID |
| selectedattributes | array | array of key-value pair of selected attributes |
| quantity | integer | Quantity of customized product to add to shopping cart |
| percentagePrice | number | Percentage increase in product price due for customization, if any |
| price | money | Unit price (in the currency of your e-commerce) of the created design to be added to the one of the product |
| design | object | Object containing design information with sides data |
| design.sides | array | Array of side objects containing: referenceKey (side identifier), name (side display name), hasDesignElements (boolean indicating if side has design elements), usedColors (number of colors used on this side) |
N.B. attribute keys must match those imported by CSV products
The price property specifies the unit price, encompassing any initial setup costs. It is important to carefully note the number of decimal places in this price, as it may exceed the standard two digits.
If we indicate the unit price of the product on the e-commerce with unitPrice, the global unit price could be calculated as follows:
finalUnitPrice = unitPrice + price + (unitPrice*percentPrice/100);
finalPrice = finalUnitPrice * quantity;
In response, provide a JavaScript object that will contain the final price and any out of stock.
{
    price = 100,
    isOutOfStock = false
}
Where:
| Attribute | Description |
|---|---|
| price | Final product unit price, including both the product price and the design price. |
| isoutofstock | false: if product is in stock true: if product is not available (out of stock, ect.) |
4.6 GetProductAttribute
This Javascript function allows Zakeke to retrieve information about all the attributes and variants of an ecommerce product. Attributes constitute the single variable characteristics of a product that a customer can choose at the time of purchase (e.g. Size, Color, etc.). A variant is a particular combination of attribute values made available for online purchase. If, for example, a product has two attributes, Size and Color, with the possible values (S and M) and (Yellow and Red) respectively, then a possible variant for the product could be the combination Size=S and Color =Red or Size=M and Color=Red.
The Javascript function must be implemented client-side by defining a JavaScript callback. It must be specified via the getProductAttribute property of the config object:
{
    //...//
    getProductAttribute : {javascript function object},
    //...//
}
4.6.1 Callback request data
The javascript callback sends this data:
{
    productId: "productId"
}
Where:
| Property | Type | Description |
|---|---|---|
| productId | string | Unique product ID |
In response, the Javascript function must provide a object that will contain the attributes and variants of the products:
{
    "attributes": [
        {
            // Size attribute
            code: "1",
            label: "Size",
            values: [
                {
                    code: "m",
                    label: "M"
                },
                {
                    code: "s",
                    label: "S"
                }
            ]
        },
        {
            // Color attribute
            code: "2",
            label: "Color",
            values: [
                {
                    code: "blue",
                    label: "Blue"
                },
                {
                    code: "green",
                    label: "Green"
                }
            ]
        }
    ],
    variants: [
        [
            // Variant 1 (Size: M, Color: Yellow)
            {
                code: "1",
                value: {
                    code: "m"
                }
            },
            {
                code: "2",
                value: {
                    code: "blue"
                }
            },

        ],
        [
            // Variant 2 (Size: M, Color: Red)
            {
               code: "1",
               value: {
                    code: "s"
                }
            },
            {
               code: "2",
               value: {
                    code: "green"
                }
            }
        ],
        // ...
        // ...
    ]
}
Where:
| Property | Type | Description |
|---|---|---|
| Attributes | array | The list of the product attributes |
| Variants | array | The list of the product variants |
Each attribute is an object having the following structure:
{
    code: "1",
    label: "Size",
    values: [
        {
            code: "m",
            label: "M"
        },
        {
            code: "s",
            label: "S"
        }
    ]
}
Where:
| Property | Type | Description |
|---|---|---|
| code | string | The attribute identifier (code or key) in the ecommerce |
| label | string | The attribute name that can also be used in a selection user interface |
| values | array | the list of possible values for the attribute, with code and label for each of the values |
Each variant of the variants array represents the list of code-value pairs for the attributes that characterize it. Each code-value pair for a single attribute of the variant will be represented by an object of the type:
{
    code: "1",
    value: {
        code: "s"
    }
}
where:
| Property | Type | Description |
|---|---|---|
| code | string | The attribute identifier (code or key) in the ecommerce |
| value | object | The object containing the code of the attribute value |
4.6.2 JavaScript callback
Alternatively, if the getProductAttribute property is defined in the JavaScript configuration, you can use a JavaScript function to submit product attributes and variants.
function callback(){
    // callback code to send the equipment of the products
    return productData = {
        attributes: [
            // Attribute I
            {
                code: "1",
                label: "Size",
                values: [
                    { code: "m", label: "M" },
                    { code: "s", label: "S" }
                ]
            },
            // Attribute II
            {
                code: "2",
                label: "Color",
                values: [
                    {   code: "blue", label: "Blue" },
                    { code: "green", label: "Green" }
                ]
            }
        ],
        variants: [
            // Variant I
            [
                { code: "1", value: { code: "m" } },
                { code: "2", value: { code: "blue" } }
            ],
            // Variant II
            [
                { code: "1", value: { code: "s" } },
                { code: "2", value: { code: "green" } }
            ]
        ]
    };
}
// Customizer config
var config = {
    //...
    getProductAttribute : callback,
    //...
}
var customizer = new ZakekeDesigner();

customizer.createIframe(config)
4.7 AddToCartNameAndNumber
Zakeke's “Names and Numbers” tool is a feature that allows shoppers to add multiple product variants to their shopping cart by customizing specific fields with the same design. This tool is used creatively in various contexts, such as identifying players on sports jerseys or customizing items for events.
This javascript callback will be called by Zakeke to tell e-commerce that the end user has decided (by clicking the “Add to Cart” button) to add the customized product (with names and numbers) to the cart.
4.7.1 Callback request data
The javascript callback sends this data:
{
    productId: "productId",
    designId: "designId",
    namesandnumbers: [
        {
            modificationid: "modificationid",
            elementdescs: {
                id: "elementdescid",
                elements: [
                    {
                        tag: "name",
                        text: {
                            content: "my name 1"
                        }
                    },
                    {
                        tag: "number",
                        text: {
                            content: "01"
                        }
                    }
                ]
            },
            selectedattributes: [
                {
                    Id: "1",
                    Value: {
                        Id: "m"
                    }
                },
                {
                    Id: "2",
                    Value: {
                        Id: "y"
                    }
                }
            ],
            quantity: 5,
            previewimageurl: "url-to-preview-image"
        }
    ],
    previews: [
       {
            url: "url-to-preview-image",
            sideName: "side name",
            modificationID: "modificationid"
        }
    ],
    extraOptions: [
        {
            name: "extraOptionName",
            value: "extraOptionValue",
            price: 10.5,
            metadata: { /* extra option specific data */ }
        }
    ],
    moqInfo: {
        minQuantity: 10,
        quantityStep: 5,
        quantityPackages: null,
        quantityRuleType: "product"
    }
}
Where:
| Property | Type | Description |
|---|---|---|
| productId | string | Unique product ID |
| designId | string | Unique design ID applied to the customized product |
| namesandnumbers | array | The list of specific values to apply to the design fields and for which product variations |
| previews | array | The list of the preview images generated for each different design fields value combination |
| extraOptions | array | Array of extra option objects. Each object contains: name (string - the extra option name), value (string | null - the selected value), price (number - the price associated with the extra option), metadata (object | undefined - optional object with extra option specific properties) |
| moqInfo | object | MOQ (Minimum Order Quantity) rules applied to the product. Present only when enableMoq is set to true in the config object. For more details go to MOQ feature. |
The designId provided as input to the javascript callback can be used in the API call to Zakeke to retrieve details about the user's created design. (Go to DESIGN API for more information.)
The namesandnumbers property is an array of objects, each of which specifies the combination of values for the design fields, for which product variant to use that combination, and in what quantity. The object of the array has the following structure:
{
    modificationid: "modificationid",
    elementdescs: {
        id: "elementdescid",
        elements: [
            {
                tag: "name",
                text: {
                    "content": "my name 1"
                }
            },
            {
                tag: "number",
                text: {
                    "content": "01"
                }
            }
        ]
    },
    selectedattributes: [
        {
            Id: "1",
            Value: {
                Id: "m"
            }
        },
        {
            Id: "2",
            Value: {
                Id: "y"
            }
        }
    ],
    quantity: 5,
    previewimageurl: "url-to-preview-image",
    minQuantity: 10,
    quantityStep: 5,
    quantityPackages: null,
    quantityRuleType: "variant"
}
where:
| Property | Type | Description |
|---|---|---|
| modificationid | string | Unique identifier generated by Zakeke for the field value combination |
| elementdescs | object | The list of values for the design fields |
| selectedattributes | array | Array of key-value pair of selected attributes |
| quantity | integer | The quantity of customized product for the combination of design field values to add to cart |
| previewimageurl | string | The image preview of the customized product with the combination of design field values applied |
| minQuantity | number | The minimum required quantity that must be purchased for this variant. Present when enableMoq is true and the rule is variant-level. See Variant-level rules in Bulk and NameAndNumber. |
| quantityStep | number | null | The fixed quantity step increment for this variant. Present when enableMoq is true and the rule is variant-level. |
| quantityPackages | number[] | null | The list of allowed predefined quantity packages for this variant. Present when enableMoq is true and the rule is variant-level. |
| quantityRuleType | 'product' | 'variant' | The scope of the rule. Present when enableMoq is true and the rule is variant-level (in which case it always equals 'variant'). |
4.7.2 JavaScript callback
Alternatively, if the addToCartNameAndNumber property is defined in the configuration JavaScript, you can use a JavaScript function to manage the adding of the customized product to the cart when the names and numbers tool is enabled. The callback will receive in input the same JSON object defined above for the HTTP call.
The following code shows how to define the callback in the JavaScript configuration code:
// Callback product into shopping cart name and number
function callback(jsonInput){

    window.location.href = "https://your-store/cart";
}
// Customizer config
var config = {
    //...
    addToCartNameAndNumber : callback,
    //...
}

var customizer = new ZakekeDesigner();

customizer.createIframe(config)
In response, the Javascript function must provide a object with the URL of the shopping cart page.
{
    window.location.href = "http://your.store.com/page";
}
4.8 EditAddToCartNameAndNumber
After adding a customized product to the cart, a user may want to change its design by reopening the Zakeke customization interface where the initial "Add to cart" button will be replaced with the "Save changes" one. When this button is pressed, Zakeke calls the specified Javascript function to notify the ecommerce that the customized product has undergone changes. The Javascript function manages the case of modifying a product in the cart when it has been customized with the "Names and numbers" tool.
The Javascript function must be implemented client-side by defining a JavaScript callback. It must be specified via theeditAdditToCartNameAndNumber property of the config object:
{
    //...//
    editAddToCartNameAndNumber: {javascript function object},
    //...//
}
The Javascript function must update the custom product previously added into the shopping cart, with the one with the changed design.
N.B.The design ID will remain unchanged even after the editing.
4.8.1 Callback request data
The Javascript function will be called in post with a JSON in the body with the same structure as the one used for the Shopping Cart how to configure the "AddToCart" in the Names and Numbers case
In response, the Javascript function must provide a Javascript object that will contain the URL of the shopping cart page.
{
    window.location.href = "string (shopping cart URL)";
}
4.8.2 JavaScript callback
Alternatively, if the editAddToCartNameAndNumber property is defined in the configuration JavaScript object, you can use a JavaScript function manage the editing of the customizer product into the cart. [ copiare il data mandato ]
// Callback edit product into shopping cart name and number
function callback(jsonInput){
    //...
}
// Customizer config
var config = {
    //...
    editAddToCartNameAndNumber : callback,
    //...
}

var customizer = new ZakekeDesigner();

customizer.createIframe(config)
4.9 OnBackClicked
The property allows you to specify the JavaScript function to be called when the "Back" button inside the Zakeke IFrame is pressed.
function callback(jsonInput){
    window.location.href = "https://www.zakeke.com/";
}
// Customizer config
var config = {
    //...
    onBackClicked : callback,
    //...
}

var customizer = new ZakekeDesigner();

customizer.createIframe(config)
4.10 SharedDesignUrl
In Zakeke, the end user has the ability to share the customization they have created on a product. To allow a design to be shared among multiple users, a link must be generated that allows the receiving user to directly open the Zakeke customizer within the ecommerce with the shared design automatically uploaded.
On the client side by defining a JavaScript callback, it allows Zakeke to request the ecommerce to generate the link from the current design identifier. The ecommerce will have the ability to implement all the logic to generate the correct link that has all the necessary parameters for the product and design to load.
{
    //...//
    isSharedDesign: true,
    getSharedDesign: {javascript function object},
    shareUrlPrefix: "http://your.store.com/",
    //...//
}
4.10.1 Callback request data
The javascript callback sends this data:
{
    designId: "designId",
}
Where:
| Property | Type | Description |
|---|---|---|
| productId | string | Unique product ID |
| designId | string | Unique design ID applied to the customized product |
In response, the Javascript function must provide a object with the URL to share:
{
    url: "http://your.store.com/QjIuKgt7F0SH52YVLGArgg"
}
4.10.2 JavaScript callback
The getSharedDesign property is defined in the configuration JavaScript object, use a JavaScript function to handle URL generation.
function callback(zakekeData){
    return url = "https://your-store/" + zakekeData;
}
// Customizer config
var config = {
    //...
    onBackClicked : callback,
    //...
}

var customizer = new ZakekeDesigner();

customizer.createIframe(config)
4.11 AddToCartBulk - Single output version (Deprecated)
This version of the AddToCartBulk callback (single print file shared across all variants) is deprecated and kept here only for backward compatibility with existing integrations. It will not receive new features and may be removed in a future release.
For all new integrations, use the Individual output version (section 4.13), which generates a separate print-ready file for each ordered variant and is enabled by setting isBulkIndividualFile: true in the config object.
In Zakeke it is possible to activate the ability to purchase multiple variants of the same product with the same design in bulk. The function is available in two versions. In the first case, Zakeke generates a single version of the print files to be used for all the variants the user has chosen to purchase. In the second case, Zakeke generates a different file for each of the variants chosen by the user.
In this and subsequent sections we will describe the Javascript function (for adding to cart and for editing) related to the first possibility, single print file, while later we will also introduce the Javascript function for the second.
As usual, the Javascript function can be implemented client-side by defining a JavaScript callback. it must be specified via the addToCartBulk property of the config object:
{
    //...//
    addToCartBulk: {javascript function object},
    //...//
}
4.11.1 Callback request data
The javascript callback sends this data:
{
    productId: "productId",
    designId: "designId",
    bulkvariations: [
        {
            attributes: [
                {
                    Id: "1",
                    Value: {
                        Id: "m"
                    }
                },
                {
                    Id: "2",
                    Value: {
                        Id: "y"
                    }
                }
            ],
            quantity: 2
        },
        {
            attribute : [
                {
                    Id: "1",
                    Value: {
                        Id: "m"
                    }
                },
                {
                    Id: "2",
                    Value: {
                        Id: "r"
                    }
                }
            ],
            quantity: 3
        }
    ],
    previews: [],
    extraOptions: [
        {
            name: "extraOptionName",
            value: "extraOptionValue",
            price: 10.5,
            metadata: { /* extra option specific data */ }
        }
    ]
}
Where:
| Property | Type | Description |
|---|---|---|
| productId | string | Unique product ID. |
| designId | string | Unique design ID applied to the customized product. |
| bulkvariations | array | Array of variants with the desired quantity for each of them. |
| previews | array | Array of preview images |
| extraOptions | array | Array of extra option objects. Each object contains: name (string - the extra option name), value (string | null - the selected value), price (number - the price associated with the extra option), metadata (object | undefined - optional object with extra option specific properties) |
Variants in bulkvariations are specified via an array of code-value pairs, where each code-value pair represents the selection for a specific attribute.
In response, the Javascript function must provide a Javascript object with the URL of the shopping cart page.
{
    window.location.href = "string (shopping cart URL)";
}
4.11.2 JavaScript callback
Alternatively, if the addToCartBulk property is defined in the configuration JavaScript object, you can use a JavaScript function to manage the adding of the customized product to the cart. The callback will receive in input the same Javascript object.
// Callback edit product into shopping cart bulk
function callback(zakekeData){
    //...
    window.location.href = "https://your-store/cart";
}
// Customizer config
var config = {
    //...
    addToCartBulk : callback,
    //...
}

var customizer = new ZakekeDesigner();

customizer.createIframe(config)
4.12 EditAddToCartBulk
After adding a custom product to the shopping cart with the mass changes module, a user may want to change its design by reopening the Zakeke customization interface, where the initial “Add to Cart” button will be replaced by the “Save Changes” button. When this button is pressed, Zakeke calls the specified Javascript function to notify ecommerce that the customized product has undergone changes.
The Javascript function can be implemented client-side by defining a JavaScript callback. It must be specified via the editAdditToCartBulk properties of the config object:
{
    //...//
    editAddToCartBulk: {javascript function object},
    //...//
}
4.12.1 Callback request data
The javascript callback sends this data:
{
    productId: "productId",
    designId: "designId",
    bulkvariations: [
        {
            attributes: [
                {
                    Id: "1",
                    Value: {
                        Id: "m"
                    }
                },
                {
                    Id: "2",
                    Value: {
                        "Id": "y"
                    }
                }
            ],
            quantity: 2
        },
        {
            attributes: [
                {
                    Id: "1",
                    Value: {
                        Id: "m"
                    }
                },
                {
                    Id: "2",
                    Value: {
                        Id: "r"
                    }
                }
            ],
            quantity: 3
        }
    ],
    previews: [],
    extraOptions: [
        {
            name: "extraOptionName",
            value: "extraOptionValue",
            price: 10.5,
            metadata: { /* extra option specific data */ }
        }
    ]
}
Where:
| Property | Type | Description |
|---|---|---|
| productId | string | Unique product ID. |
| designId | string | Unique design ID applied to the customized product. |
| bulkvariations | array | Array of variants with the desired quantity for each of them. |
| previews | array | Array of preview images |
| extraOptions | array | Array of extra option objects. Each object contains: name (string - the extra option name), value (string | null - the selected value), price (number - the price associated with the extra option), metadata (object | undefined - optional object with extra option specific properties) |
Variants in bulkvariations are specified via an array of code-value pairs, where each code-value pair represents the selection for a specific attribute.
In response, the Javascript function must provide a Javascript object with the URL of the shopping cart page.
{
    window.location.href = "string (shopping cart URL)";
}
4.12.2 JavaScript callback
// Callback edit product into shopping cart bulk
function callback(jsonInput){
    //...
}
// Customizer config
var config = {
    //...
    editAddToCartBulk : callback,
    //...
}

var customizer = new ZakekeDesigner();

customizer.createIframe(config)
4.13 AddToCartBulk - Individual output version
The Javascript function will be invoked by Zakeke in case of bulk addition to the shopping cart of a customized product in multiple variants and when the generation of a different print file for each variant has been enabled. The isBulkIndividualFile property of the JavaScript configuration file can be used to enable this second version of the bulk purchase.
The Javascript function must be implemented client-side by defining a JavaScript callback. It must be specified via the addToCartBulk property of the config object:
{
    //...//
    isBulkIndividualFile: true,
    addToCartBulk: {javascript function object},
    //...//
}
4.13.1 Callback request data
The javascript callback sends this data:
{
    productId: "productId",
    designId: "designId",
    bulkvariations: [
        {
            modificationID: "modificationid",
            selectedattributes: [
                {
                    Id: "1",
                    Value: {
                        Id: "m"
                    }
                },
                {
                    Id: "2",
                    Value: {
                        "Id: "y"
                    }
                }
            ],
            quantity: 5,
            tempPreviewImageUrl: "urlPreview"
        }
    ],
    previews: [],
    extraOptions: [
        {
            name: "extraOptionName",
            value: "extraOptionValue",
            price: 10.5,
            metadata: { /* extra option specific data */ }
        }
    ],
    moqInfo: {
        minQuantity: 10,
        quantityStep: 5,
        quantityPackages: null,
        quantityRuleType: "product"
    }
}
Where:
| Property | Type | Description |
|---|---|---|
| productId | string | Unique product ID |
| designId | string | Unique design ID applied to the customized product |
| bulkvariations | array | Array of variants with the desired quantity for each of them. |
| previews | array | Array of preview images |
| extraOptions | array | Array of extra option objects. Each object contains: name (string - the extra option name), value (string | null - the selected value), price (number - the price associated with the extra option), metadata (object | undefined - optional object with extra option specific properties) |
| moqInfo | object | MOQ (Minimum Order Quantity) rules applied to the product or variant. Present only when enableMoq is set to true in the config object. For more details go to MOQ feature. |
The designId provided as input to the endpoint can be used in the API call to Zakeke to retrieve details about the user's created design. (Go to DESIGN API for more information.)
The bulkvariations property is an array of objects, each of which specifies the combination the product variant added to the cart and in what quantity. The object of the array has the following structure:
{
    modificationid: "modificationid",
    selectedattributes: [
        {
            Id: "1",
            Value: {
                Id: "m"
            }
        },
        {
            Id: "2",
            Value: {
                Id: "y"
            }
        }
    ],
    quantity: 5,
    previewimageurl: "url-to-preview-image",
    minQuantity: 10,
    quantityStep: 5,
    quantityPackages: null,
    quantityRuleType: "variant"
}
where:
| Property | Type | Description |
|---|---|---|
| modificationid | string | Unique identifier generated by Zakeke for the variant |
| selectedattributes | array | Array of key-value pair of selected attributes |
| quantity | integer | The quantity of customized product for the combination of design field values to add to cart |
| previewimageurl | string | The image preview of the customized product in the selected variant |
| minQuantity | number | The minimum required quantity that must be purchased for this variant. Present when enableMoq is true and the rule is variant-level. See Variant-level rules in Bulk and NameAndNumber. |
| quantityStep | number | null | The fixed quantity step increment for this variant. Present when enableMoq is true and the rule is variant-level. |
| quantityPackages | number[] | null | The list of allowed predefined quantity packages for this variant. Present when enableMoq is true and the rule is variant-level. |
| quantityRuleType | 'product' | 'variant' | The scope of the rule. Present when enableMoq is true and the rule is variant-level (in which case it always equals 'variant'). |
In response, the Javascript function must provide a JSON object with the URL of the shopping cart page.
{
    window.location.href = "string (shopping cart URL)";
}
4.13.2 JavaScript callback
The following code shows how to define the callback in the JavaScript configuration code:
// Callback edit product into shopping cart bulk
function callback(jsonInput){
    //...
     window.location.href = "https://your-store/cart";
}
// Customizer config
var config = {
    //...
    editAddToCartBulk : callback,
    //...
}

var customizer = new ZakekeDesigner();

customizer.createIframe(config)
4.14 EditAddToCartBulk
After adding a custom product to the shopping cart with the massive variations module, a user may wish to change its design by reopening the Zakeke customization interface, where the initial “Add to Cart” button will be replaced by the “Save Changes” button. When this button is pressed, Zakeke calls the specified Javascript function to notify e-commerce that the customized product has undergone changes.
The Javascript function must be implemented client-side by defining a JavaScript callback. It must be specified via the editAddToCartBulk property of the config object:
{
    //...//
    isBulkIndividualFile: true,
    //...//
    editAddToCartBulk: {javascript function object},
    //...//
}
The Javascript function must update the custom product previously added into the shopping cart, with the one with the changed design.
N.B.The design ID will remain unchanged even after the editing.
4.14.1 Callback request data
The Javascript function will be called in post with a Javascipt object in the body with the same structure as the one used for the Shopping Cart Javascript function how to configure the "AddToCart" Javascript function in the Bulk variations case
In response, the Javascript function must provide a Javascript object that will contain the URL of the shopping cart page.
{
    window.location.href = "string (shopping cart URL)";
}
4.14.2 JavaScript callback
// Callback edit product into shopping cart bulk
function callback(zakekeData){
    //
}
// Customizer config
var config = {
    //...
    editAddToCartBulk : callback,
    //...
}

var customizer = new ZakekeDesigner();

customizer.createIframe(config)
4.15 HideVariants
When you set this property to false, you will have the option to select and change the product variant each time you open the iframe, allowing for greater customization and flexibility. Additionally, you can customize the interface using the "Interface Editor" tool. This Guide provides detailed instructions on how to do it.
4.16 ConvertPriceCurrency
When the store needs to handle Extra options prices based on specific store logic (e.g. currency conversion), the convertPriceCurrency callback can be used. This callback is invoked only when manageConvertPriceCurrency is set to true in the config object.
The callback can be implemented client-side by defining a JavaScript function. It must be specified via the convertPriceCurrency property of the config object:
// Callback to convert Extra options prices
function callback(zakekeData){
    // perform currency conversion logic
    return [4, 5, 2];
}
// Customizer config
var config = {
    //...
    manageConvertPriceCurrency: true,
    convertPriceCurrency: callback,
    //...
}

var customizer = new ZakekeDesigner();

customizer.createIframe(config)
4.16.1 Callback request data
The callback will be called with the following Javascript object:
{
    prices: [1, 5, 10.2]
}
Where:
| Property | Type | Description |
|---|---|---|
| prices | array | Array of prices (number) of the Extra options that need to be converted |
In response, the callback must return an array of converted prices in the same order:
[4, 5, 2]
Where the returned array contains the converted prices (number[]) corresponding to the input prices array.
4.17 MOQ (Minimum Order Quantity)
The MOQ (Minimum Order Quantity) feature allows you to define quantity rules at the product or variant level. These rules can include a minimum required quantity, a fixed step increment, or a list of predefined quantity packages that the end user can purchase.
The feature is enabled by setting the enableMoq property of the config object to true:
{
    //...//
    enableMoq: true,
    //...//
}
When the feature is active, the customizer enforces the MOQ rules in its UI (validation/snap of the quantity) and provides the merchant with a moqInfo object inside the payload of every add-to-cart and edit callback.
4.17.1 MoqInfo object structure
type QuantityRuleType = 'product' | 'variant';

interface MoqInfo {
    minQuantity: number;
    quantityStep: number | null;
    quantityPackages: number[] | null;
    quantityRuleType: QuantityRuleType;
}
Where:
| Property | Type | Description |
|---|---|---|
| minQuantity | number | The minimum required quantity that must be purchased. |
| quantityStep | number | null | The fixed quantity step increment. Non-null when the rule is a fixed step increment (e.g. 5 means quantities can be minQuantity, minQuantity + 5, minQuantity + 10, ...). |
| quantityPackages | number[] | null | The list of allowed predefined quantity packages. Non-null when the rule is based on custom tiers (e.g. [10, 25, 50, 100]). |
| quantityRuleType | 'product' | 'variant' | The scope of the rule: product if the MOQ rule applies to the whole product, variant if it applies to a specific variant. |
quantityStep and quantityPackages are mutually exclusive. Only one of the two will be non-null based on the rule configured in the back-office.
4.17.2 Callbacks receiving moqInfo
The moqInfo object is delivered to the merchant in the payload of the following callbacks:
- addToCart / editAddToCart
- addToCartBulk / editAddToCartBulk
- addToCartNameAndNumber / editAddToCartNameAndNumber
When the MOQ feature is enabled (enableMoq: true), the getProductPrice callback is mandatory. The customizer uses it to query the store for the product price based on the currently selected quantity.
4.17.3 Variant-level rules in Bulk and NameAndNumber
When the configured MOQ rule has quantityRuleType: 'variant', the Bulk and NameAndNumber callbacks (addToCartBulk / editAddToCartBulk / addToCartNameAndNumber / editAddToCartNameAndNumber) deliver the MOQ rules on each item of the array (bulkvariations[i] or namesandnumbers[i]), in addition to the top-level moqInfo object. This is because different variants of the same product can have different MOQ rules configured in the back-office.
Each item carries the same four MOQ fields as the MoqInfo interface — minQuantity, quantityStep, quantityPackages, quantityRuleType — describing the rule that applies to that specific variant.
When the rule is variant-level, the per-item fields are the source of truth. The top-level moqInfo object only carries quantityRuleType: 'variant' as a reliable signal; the other top-level fields (minQuantity, quantityStep, quantityPackages) may not reflect the rule of any specific variant and should not be used for validation.
When the rule is product-level (quantityRuleType: 'product'), the per-item MOQ fields are not present and the top-level moqInfo applies to the sum of the item quantities.
Example of a addToCartBulk payload with a variant-level rule:
{
    productId: "productId",
    designId: "designId",
    bulkvariations: [
        {
            modificationID: "modificationid-1",
            selectedattributes: [
                { Id: "1", Value: { Id: "m" } },
                { Id: "2", Value: { Id: "red" } }
            ],
            quantity: 10,
            previewimageurl: "url-to-preview-image",
            minQuantity: 10,
            quantityStep: 5,
            quantityPackages: null,
            quantityRuleType: "variant"
        },
        {
            modificationID: "modificationid-2",
            selectedattributes: [
                { Id: "1", Value: { Id: "l" } },
                { Id: "2", Value: { Id: "blue" } }
            ],
            quantity: 25,
            previewimageurl: "url-to-preview-image",
            minQuantity: 25,
            quantityStep: null,
            quantityPackages: [25, 50, 100],
            quantityRuleType: "variant"
        }
    ],
    previews: [],
    extraOptions: [],
    moqInfo: {
        minQuantity: 0,
        quantityStep: null,
        quantityPackages: null,
        quantityRuleType: "variant"
    }
}
In this example the first variant uses a step-based rule (minQuantity: 10, quantityStep: 5) while the second variant uses predefined packages (quantityPackages: [25, 50, 100]). Validate each item against its own embedded MOQ fields.
5. CUSTOMIZE button
In the standard Zakeke usage flow, the Customizer UI (the IFrame) is opened from the product page through the 'Customize' call to action (typically a button). This button becomes visible when a product is configured as customizable in the Zakeke back-office. Here's a summary of the standard flow: Customize > Zakeke UI > Add to Cart > Cart.
It's essential to note that this flow is optional, as long as you implement an alternative system to open the IFrame. However, if you choose to implement the 'Customize' button, follow these steps:
5.1 Adding Customizer Button
This is usually an HTML button to be placed next to the "ADD TO CART" button:
<button id="btnCustomize" type="button">Customize<button>
Clearly you can use any HTML element as long as it has as btnCustomize identifier.
5.2 HTML FORM
Before closing the body tag, you will need to add the following html FORM:
<form id="frmCustomizer" action="{Customizer URL}">
  <input type="hidden" name="quantity" />
  <input type="hidden" name="productid" />
  <input type="hidden" name="{attributeKey1}" />
  ..
  <input type="hidden" name="{attributeKeyn}" />
</form>
Where:
| Attribute | Attribute value | Description |
|---|---|---|
| form action | Customizer URL | URL of the created customizer page (refer to the reference section of the URL documentation). |
| input name | quantity | Quantity to add to cart. |
| input name | productid | Unique product ID. |
| input name | attributeKey | Product attribute key (e.g. "color", "size", etc.). |
N.B. Attribute keys must match those defined in the imported products CSV. Go to how to import products for more details.
5.3 JavaScript to Send the Product Selection to the Customizer
After the HTML form and before closing the Body tag, enter the following script. It allows you to send the product selection to the customizer after clicking the "Customize" button. The script retrieves information on the quantity and options chosen for the attributes of any product variant from a hypothetical FORM present on the product page. It is clear that this logic must be adapted to the particular user interface of the product page. The clear thing is that the data relating to the quantity and product variant chosen by the user must be retrieved and sent to the Zakeke IFrame via the form prepared with the previous script.
<script>

    var btnCustomizer = document.getElementById('btnCustomize');
    btnCustomizer.addEventListener('click',
    function(evt) {

        evt.preventDefault();
        var formCustomizer = document.getElementById("frmCustomizer");
        var formProductPage = document.getElementById("{idFormProduct}");
        formCustomizer.elements["productid"].value = { productid };
        formCustomizer.elements["quantity"].value = formProductPage.elements["quantity"].value;
        formCustomizer.elements["attributeKey1"].value = formProductPage.["attributeKey1"].value;
        ...
        formCustomizer.elements["attributeKeyn"].value = formProductPage.elements["attributeKeyn"].value;
        formCustomizer.submit();

    });

</script>
Where:
| Attribute | Description |
|---|---|
idFormProduct | FORM tag ID of the product page |
productid | Unique product I |
5.4 Full HTML code Example
Below the sample code of a product page with the "customize" button integrated:
<!DOCTYPE html>
<html lang="en" xmlns="http://www.w3.org/1999/xhtml">
<head>
    <meta charset="utf-8" />
    <title>Customizable T-Shirt</title>
</head>
<body>
    <div class="content">
        <div class="foto">
            <img alt="Customizable T-Shirt" src="http://your.store.com/images/product.jpg" />
        </div>
        <div class="details">
            <h1>Customizable T-Shirt - sku: 00001</h1>
            <p>Description product.....</p>
            <form id="frmAddToCart" action="https://your.store.com/shopping-cart.html">
                <select name="quantity">
                    <option>1</option>
                    <option>2</option>
                    <option>3</option>
                    <option>4</option>
                    <option>5</option>
                </select>
                <select name="color">
                    <option value="0">Black</option>
                    <option value="1">Red</option>
                    <option value="2">White</option>
                    <option value="3">Green</option>
                </select>
                <select name="size">
                    <option value="0">S</option>
                    <option value="1">M</option>
                    <option value="2">L</option>
                    <option value="3">XL</option>
                </select>
                <button id="addToCart" type="submit">Add to shopping cart</button>
                <button id="btnCustomize" type="button">Customize</button>
            </form>
        </div>
    </div>
    <form id="frmCustomizer" action="https://your.store.com/customizer.html">
        <input type="hidden" name="sku" />
        <input type="hidden" name="quantity" />
        <input type="hidden" name="color" />
        <input type="hidden" name="size" />
    </form>
    <script>

    var btnCustomizer = document.getElementById('btnCustomize');
    btnCustomizer.addEventListener('click',
    function(evt)
    {
        evt.preventDefault();
        var formCustomizer = document.getElementById("frmCustomizer");
        var formProductPage = document.getElementById("frmAddToCart");
        formCustomizer.elements["productid"].value = '00001';
        formCustomizer.elements["quantity"].value = formProductPage.elements["quantity"].value;
        formCustomizer.elements["color"].value = formProductPage.elements["color"].value;
        formCustomizer.elements["size"].value = formProductPage.elements["size"].value;
        formCustomizer.submit();
    });

    </script>
</body>
</html>